This
sequence of images and text will follow the process that I use
to make ceremonial wood rattles.
|
It begins with
the selection of the birch wood blocks. I
try to avoid wood with weak areas as the shell will be thin and grain
weakness will likely result in structural failure somewhere along the
way. Still, some grain patterning and even the beginning of
spalting will make the finished sphere much more interesting.
I will look for
wood that is at least 2.5 inches thick if I am hollowing wood across
the grain
as opposed to end grain hollowing. I will
cut perfect square pieces, and will try to place the grain centre to
the centre of the cut piece if the end grain is important to the finished
appearance.
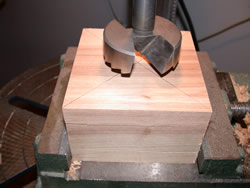
After finding the
centre by drawing two diagonal lines from the four corners, I will
bore out a shallow hole with a 2.5 inch forstner bit
so that I have a simple hole for the chuck to hold the piece for its
shaping.
|
|
Once
the centre is established by the bored hole, I will use a compass
and pencil
to scribe the largest circle that is possible
from that block, and will use the same radius setting to scribe the
second block that will be the match to the first. If making more
rattles at the same time I will pair up wood pieces that seem to have
grains that mate well. Once scribed, the block is cut to a circular
shape on a band saw to reduce the work required on the lathe. (However,
at times I have done the rounding on the lathe itself when I am doing
smaller blocks.) With a large shaping bowl gouge it can go rather
quickly as long as the shaping is done from the flat face of the block,
working toward the edges as the bowl shape is created.
|
|
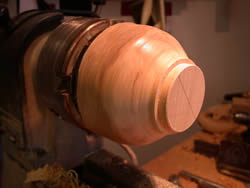
I will
first turn a 0.5 inch deep "base" with a diameter
just large enough to be held firmly by the chuck in its narrowest setting. Then
I will shape the bowl, creating as closely as I can , a hemisphere
with the largest diameter just below the face which has the bored hole
being held by the chuck. I will do this to both blank / blocks
trying to ensure that they are of the same finished diameter and as
similar
a shape as possible without actually doing measurements along the way. I
do not do final rounding or sanding until later in the process.
|
|
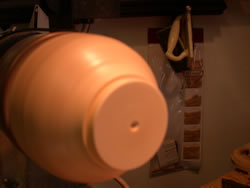
I have found it
most useful to establish the exact centre of the base with a small
dimple. Later
in the process that enables the insertion of the point of the tailpiece
at the exact
centre as
the sanding and initial turning is done to the sphere and later to
the rattle with its attached handle.
|
|
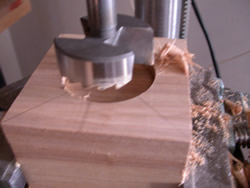
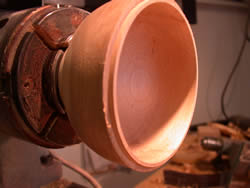
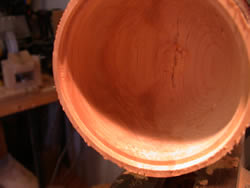
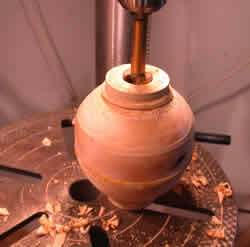
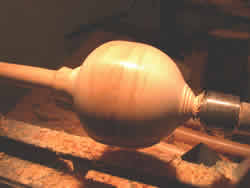
I replace
the piece on the lathe with the newly turned base in the chuck and
then
fashion the edge and hollow the hemisphere
to approximately 1/8 inch thickness. The staggered flange will
add to the gluing surface and will enable precise alignment when the
other half is turned.
|
|
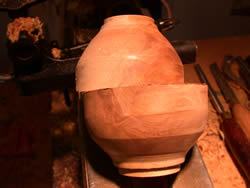
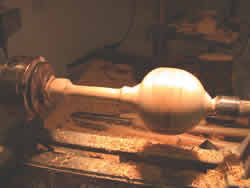
The
image to the right is the second half of the sphere with a matching
flange. I
use a sharp parting tool to precisely cut the matching flange and
test it till it is a snug fit, and then
finish the hollowing process of this second half.
|
|
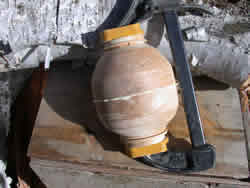
When
both halves are turned and fitted, I add glue to the flange surface
and press
the two halves together and then compress
the joint with a clamp until the glue is well set and hardened. I
do not worry about the glue squeezing out as it will be easily
turned off later. There will be little or no glue squeeze-out
to the inside because I applied the glue to the first of the two haves
turned and not the second. If you are thinking to yourself :
"He forgot to put in the pebbles / steel balls", do not
worry. I
will add them later in a very easy manner. In the past I used
to add them at this point and then had to be careful that the glue
would not get stuck to the rattle materials.
|
|
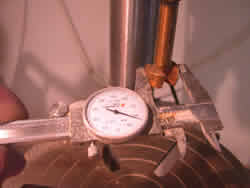
When the
hollow sphere has been properly cured (you do not want the glue to
give way), I used a 1 inch forstner bit and set a caliper to the
same diameter.
Using a 8 X 1.5
X 1.5 inch blank mounted in the lathe chuck, i turrned the handle
creating one end as a 1 inch diameter insertion point. I did
a partial cut off with a paring tool but leave the end piece
attached till later. It will need to be re-inserted in the
lathe later.
|
|
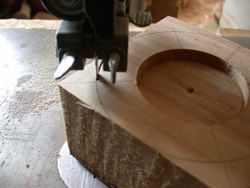
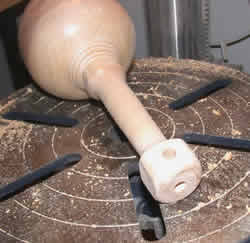
I take the
hollowed sphere and bore a 1 inch hole exactly in the centre of one
end. This is where the small dimple assists in an exact centering
of the drill bit.
|
|
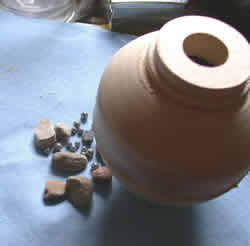
I select
pebbles and two sizes of steel ball bearing for the rattle contents. The
stones make a harder thump sound and the ball bearings will chatter
more and also roll around the inside of the rattle giving a residual
sound that the stones alone are not able to provide. These
can be easily added to the sphere at this stage and then the turned
handle is glued, inserted and then clamped for drying
|
|
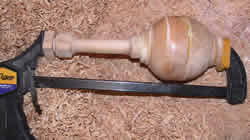
Once the
handle and rattle glue joint is properly dry the handle and
sphere are remounted on the lathe. Here again the dimple put
into the end face will assist in exact centering of the piece into
the tailpiece of the lathe. When this is mounted the trimming
and sanding process can proceed.
|

|
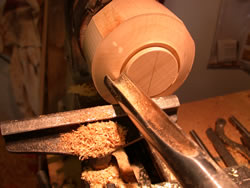
First I trimmed
down the joint between the handle and the sphere. In this manner
the wood of the sphere becomes part of the handle and adds to the
strength. Shock or resistance is able to be absorbed by the
thicker and stronger wood and not the thin portion of the sphere. Then
I trim the end at the tailpiece leaving the final 1/8 inch to be
sanded down after it is removed from the lathe. The rattle
can be further trimmed if needed and sanded down with progressively
finer grades of sand paper until the desired finish is obtained. I
ususally go through an 80 / 100 / 120 / 220 grit sequence and then
burnish the wood with a hand full of birch shavings that earlier
came from the same project. Held against the turning rattle
a nice smooth finish is achived.
|
|
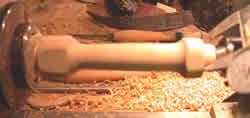
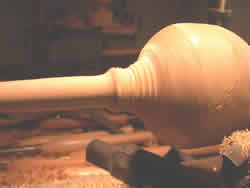
The finished rattle just prior to removal from the lathe.
|
|
Because I add a
leather thong loop at the end of the handle I bore holes through
the end and in
from the bottom. That way
I can have the loop come out of the very end of the handle.
After this it can
be waxed, varnished, lacquered, painted, decorated etc as desired. The
construction is finished.
|
|
Click
here to return to the Just For Fun Page
|
|